Step 1 - Get Ready to Hard Boil the Eggs
Your deviled egg cooking classes have begun! I know I receive a lot of questions about the best way to hard boil
eggs. And coincidentally, that is the first step to creating
deviled eggs, so mastering the cooking and peeling of the eggs is where we begin.
For those of you who already get a great result hard-boiling
your eggs (easy to peel, egg white tender, no green ring around
the yolk) just skip ahead to "Step 4 - Making
the Deviled Egg Filling"
For those who want to improve or perfect their egg-boiling
and peeling techniques, read on.
First, for the best peeling results you need to use eggs that are a week or two old. It makes them easier to peel (explained further along) and if you must go buy new eggs, choose ones that are closer to expiry than the others at the supermarket. Once in a while someone will e-mail me and tell me their shells won't come off, and it turned out all were using very fresh eggs.
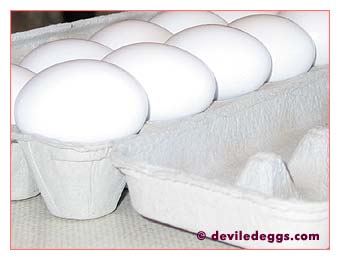 This
second bit of advice helps especially for making deviled eggs.
You can better center the egg yolks in their shells by resting
the eggs on their sides overnight (or for about 8 hours.)
And, with a centered yolk, the cooked egg whites are sturdier
to pick up and handle. I prop the eggs on their sides right
in the carton overnight. You won't be able to close the lid,
so just sit them on a shelf with a bit of clearance or cut
the egg carton lid off first. This
second bit of advice helps especially for making deviled eggs.
You can better center the egg yolks in their shells by resting
the eggs on their sides overnight (or for about 8 hours.)
And, with a centered yolk, the cooked egg whites are sturdier
to pick up and handle. I prop the eggs on their sides right
in the carton overnight. You won't be able to close the lid,
so just sit them on a shelf with a bit of clearance or cut
the egg carton lid off first.
Take your eggs from the fridge a half hour before you start
cooking them. This will reduce the amount of cracks during
cooking by reducing the shock of any rapid temperature changes.
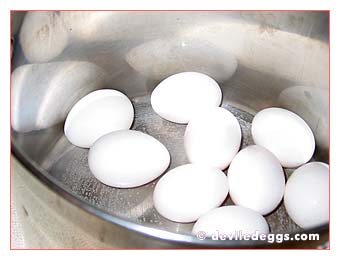 Ready to get started? Place the eggs into a pot large enough
to hold them comfortably. You don't want the eggs to be so
tight together during cooking that they bump into each other
and crack prematurely. In the picture here, you can see I've
chosen quite a large pot so that the eggs are well spaced.
As far as what kind of pot, I've boiled eggs in everything
from glass to aluminum pots and the following steps work for
them all.
Ready to get started? Place the eggs into a pot large enough
to hold them comfortably. You don't want the eggs to be so
tight together during cooking that they bump into each other
and crack prematurely. In the picture here, you can see I've
chosen quite a large pot so that the eggs are well spaced.
As far as what kind of pot, I've boiled eggs in everything
from glass to aluminum pots and the following steps work for
them all.
Each of the recipes on my site uses 6 eggs. You will likely
want to boil 8 to ensure you have enough to make your recipe
with. (Here I'm boiling a dozen.) Often, 1 or 2 eggs will
crack during boiling, peel very badly, or not have a nicely
centered yolk. (Or, if you are like me, you may eat one of
the hard-boiled eggs before you even finish the recipe!) So,
plan ahead and cook a couple of extras.
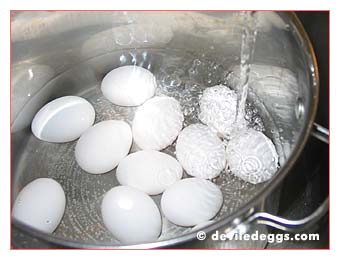 Next,
fill your pot with cold water, enough to cover the eggs by
about an inch. Add 1 teaspoon of salt to raise the boilingpoint and help your eggs cook faster. Next,
fill your pot with cold water, enough to cover the eggs by
about an inch. Add 1 teaspoon of salt to raise the boilingpoint and help your eggs cook faster.
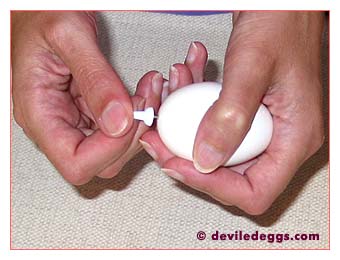
Some people have asked if I make a small hole in the end
of the egg with a push-pin before boiling. Personally, I have
not found that it produces a better result. Sometimes
(if you accidentally make the hole too large) the whites start
to ooze out the end and the cooked egg will be mis-shapen.
That's not a big deal if you are making egg salad, but for
deviled eggs you want the cooked white to be nice and round.
So, to me it seems unnecessary.
If, however, you are the experimental type,
this is where you would make the pinhole, at the fat end of
the egg:
 Next, we'll start cooking
the eggs .....
Next, we'll start cooking
the eggs .....
|